
In this article, we will look at the 4 steps needed to build a Risk Register in Jira.
For those of you fluent in Jira, this tutorial will be focusing on risk lifecycle management not the native Jira issue workflows.
What is a Risk Register and why create it in Jira?
The document where an organization or a risk manager records all identified risks, their analysis, mitigation plans, and ownership details is commonly referred to as a Risk Register. It is a centralized tool for monitoring and managing risks throughout a project or organizational risk management process.
For many organizations, Risk Register is still being built and manually maintained in a MS Excel spreadsheet that a Project Coordinator or Risk Manager tries to keep updated.
The 3 main issues with manual risk management in Excel are:
- Risk related data is not up to date,
- Human errors when entering data,
- Complete lack of audit trail, i.e. what has happened to risks throughout their lifetime.
These issues may result in incorrect risk prioritizations and risk reports which, in turn, may lead to critical risks with severe consequences being ignored. This is why we recommend creating the Risk Register in Jira with the help of dedicated risk management plugins that offer spreadsheet-like modules inside Jira that you can use to work with your risks.
How to set up a Risk Workflow in Jira?
TL;DR: check out the video tutorial instead:
You can build your risk register in Jira to meet your risk management workflow by following these four steps:
1. Pick a Template for your Risk Model and Risk Register in Jira
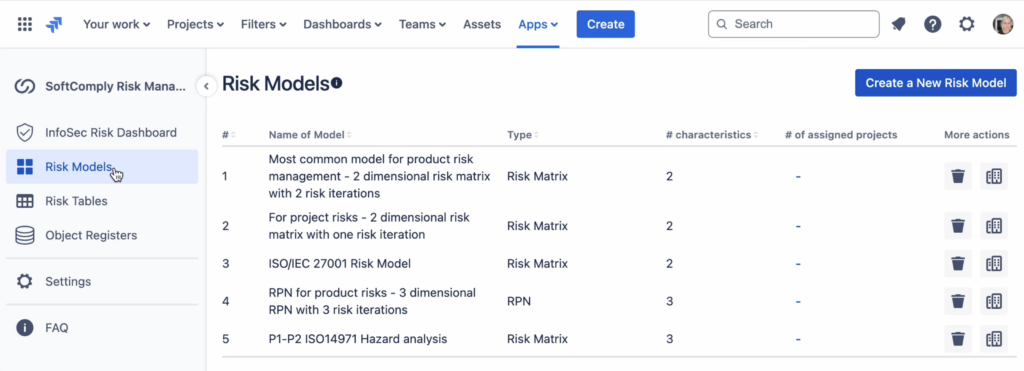
First, you can choose a template for your Risk Model and Risk Register that are closest to your current risk model and risk register.
For the Risk Model, you can choose between Risk Matrix or Risk Prioritisation Number (otherwise known as Risk Score) based Risk Model. You can also choose the one with either 2 or 3 risk characteristics. A common 2 dimensional Risk Matrix is, for example, one where you can assess risks based on their Likelihood and Impact. A 3 dimensional Risk Matrix, on the other hand, will add a third risk characteristic like Detectability.
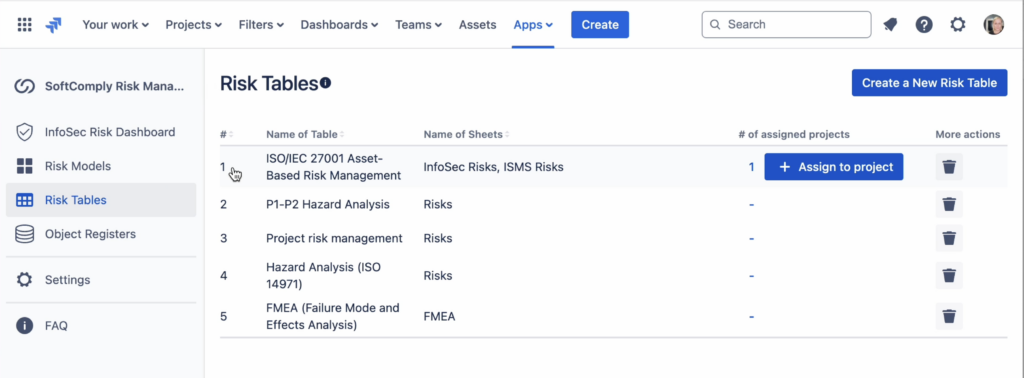
For Risk Registers, you can choose between Information Security, Project or Product Risk Management templates:
2. Modify the Risk Model and Risk Register Templates
Next, you can modify the chosen templates to correspond to your Risk Management process.
All of the Risk Model and Risk Register templates can further be customised to meet your risk management requirements.
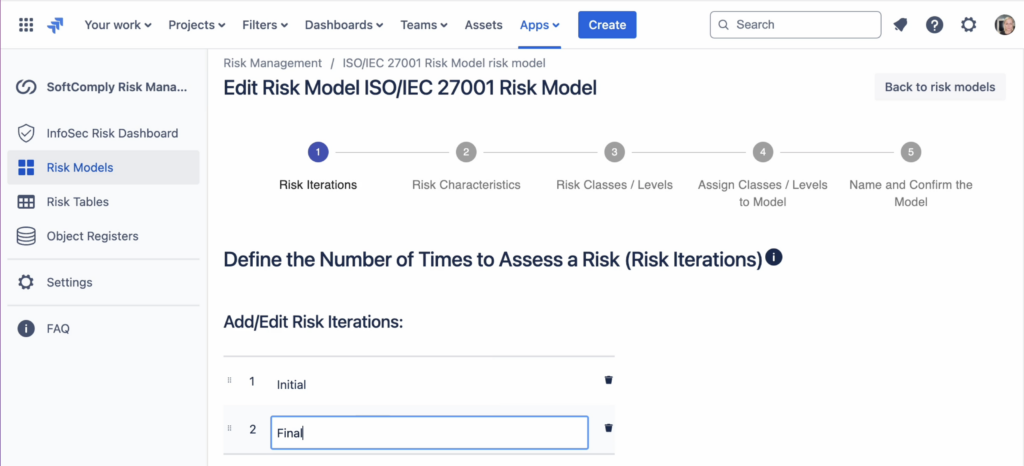
For Risk Models, you can modify the number of risk assessment steps, also called risk iterations. In some cases, you may want to assess risks twice, once when you have identified them and next, when you have mitigated them. Alternatively, you may want to add a third assessment iteration for post-market risk assessment to keep track of any risks your product might have after release. You can define up to 10 risk assessment iterations.
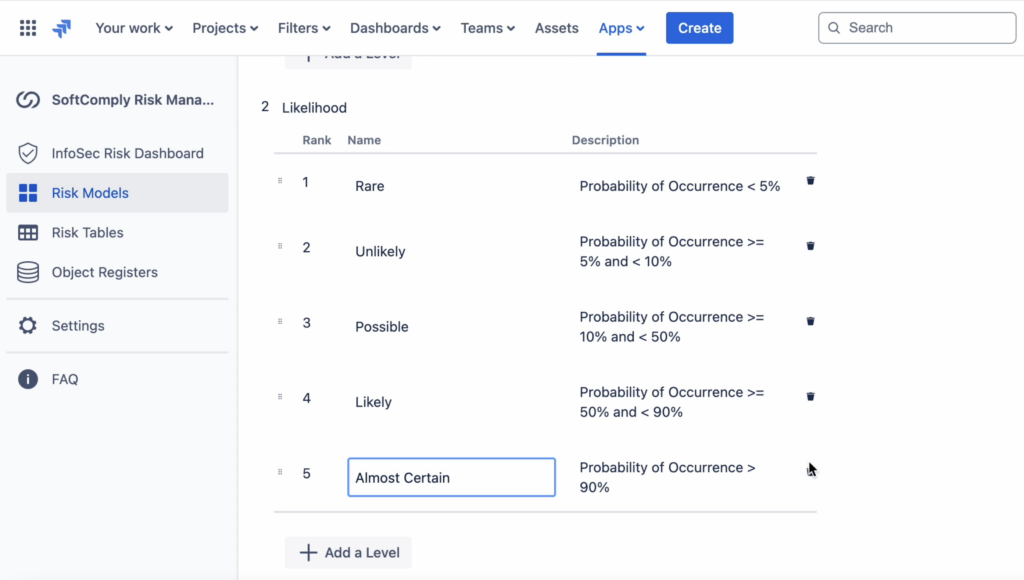
You can also modify the names, descriptions and levels of your Risk Characteristics:
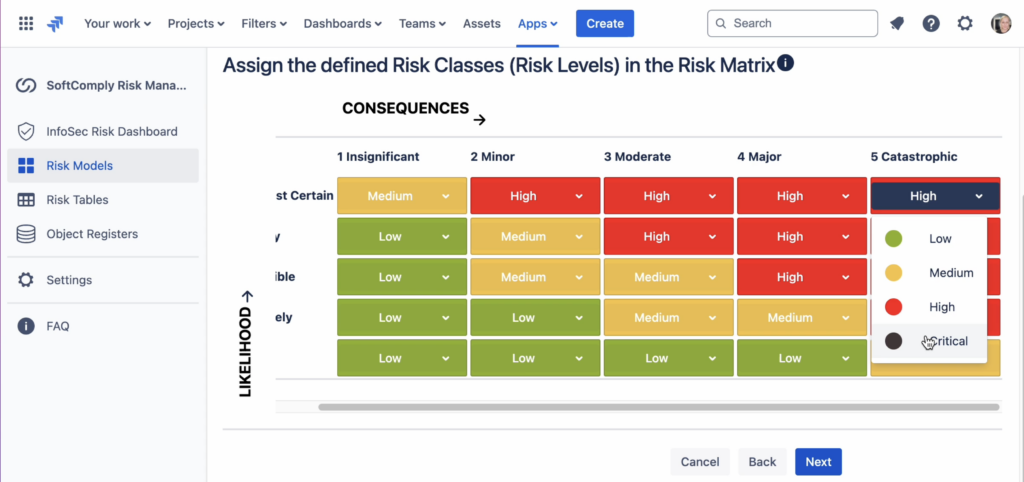
You can also modify Risk Levels directly on the Risk Matrix:
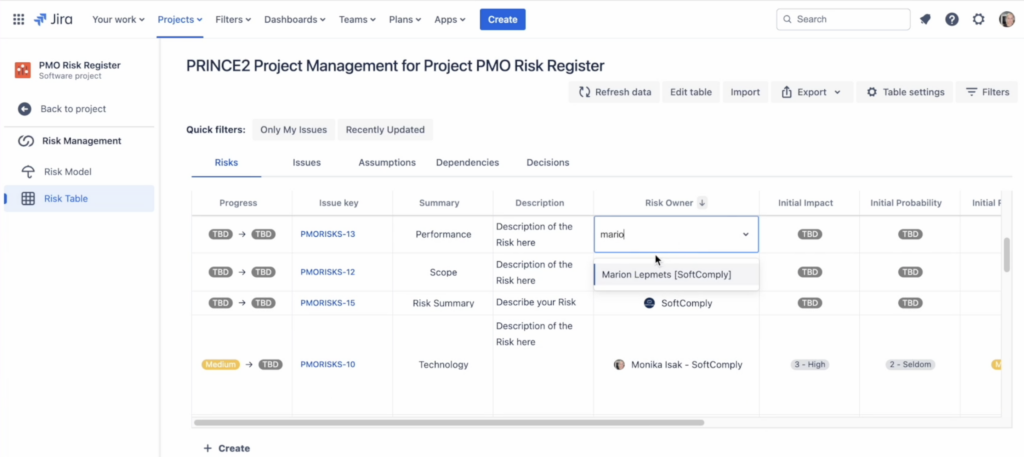
For Risk Registers, you can add additional fields to correspond to your existing Risk Register. Besides the risk management fields that are based on your Risk Model setup, you want to see Risk Owners and Risk Review Due Dates in your Risk Register. Remember that you can easily work with your risks in the Risk Register view when using filters and sorting features.
3. Add Automation and Notification to your Risks
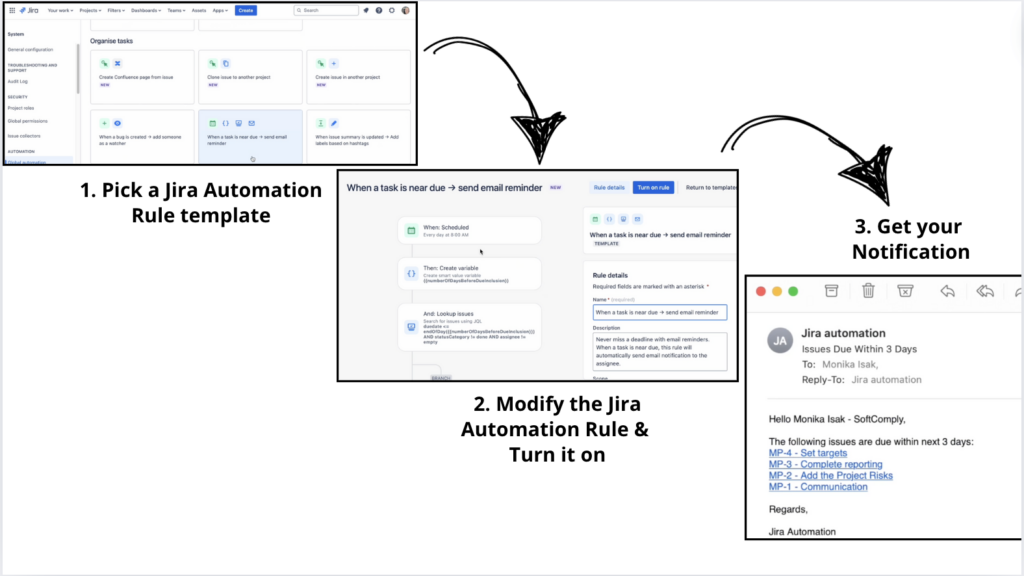
You can create an email notification to a risk owner 3 days before the risk review due date with Jira automation. You can choose between several Jira automation templates. Let’s pick the one that sends an email notification for an upcoming task. Each step of the automation rule can further be modified according to your needs – you can modify the number of days before a certain date that the notification will be sent out. You can also write the exact text for the notification email. When you have finalized all the details, you can turn on the rule. Once the rule is turned on, the risk reviewer will get an email 3 days before the risk review due date.
With risk automation and automated notifications you will not need to chase the risk owners yourself any longer and no risk owner will accidentally miss their risk review due date.
4. Monitor and Report Risks
Regularly reviewing and updating risks is vital for maintaining an effective risk management strategy in a dynamic business environment. As new risks emerge and existing risks evolve, continuous monitoring and assessment allows companies to adjust their risk management plans accordingly.
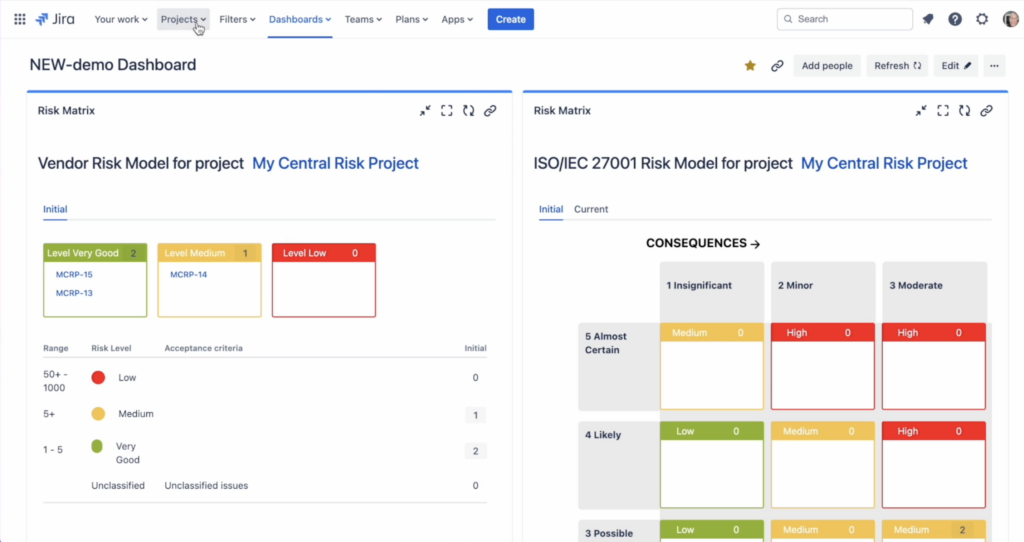
To report risks, the risk management apps provide variety of options. With the Risk Manager Plus, you can use dashboard gadgets or report risks in Confluence.
What else to consider
Set Clear Processes
Before deciding on a risk management tool, you should establish a risk management process in your organization. This should provide a structured approach to identifying, assessing, and mitigating risks, ensuring that all team members understand their roles and responsibilities.
Having a risk management process not only supports consistency in your risk management efforts but it also facilitates communication and coordination among various departments, helping to align risk management activities with the company’s overall objectives and strategic goals.
Train Your Team
Training your team in risk management is another essential activity that you should invest in prior to deciding upon a risk management solution. The goal of the training is to implement the knowledge and skills needed to identify and respond to risks proactively. All team members should understand the importance of risk management and be familiar with the tools and techniques used to assess and mitigate risks.
By fostering a risk-aware culture, companies can enhance their ability to anticipate and manage potential issues, reducing the likelihood of disruptions and improving overall organizational resilience.
Once a risk management solution has been implemented in the organization, you should train your team in the solution so everyone knows how to use it. This can be done either internally or by requesting an onboarding training from the solution vendor.
In case you want to learn more about managing risks in Jira, feel free to book a dedicated live demo with the SoftComply team.


