
Project risk management is crucial for project success, especially important to keep critical risks under check in case of (inevitable) changes. The hidden complexities of a project is the main reason why timelines are not met and the resources are spent mid-way.
Here is a quick guide for a Project Manager how to best conduct project Risk Management in Jira:
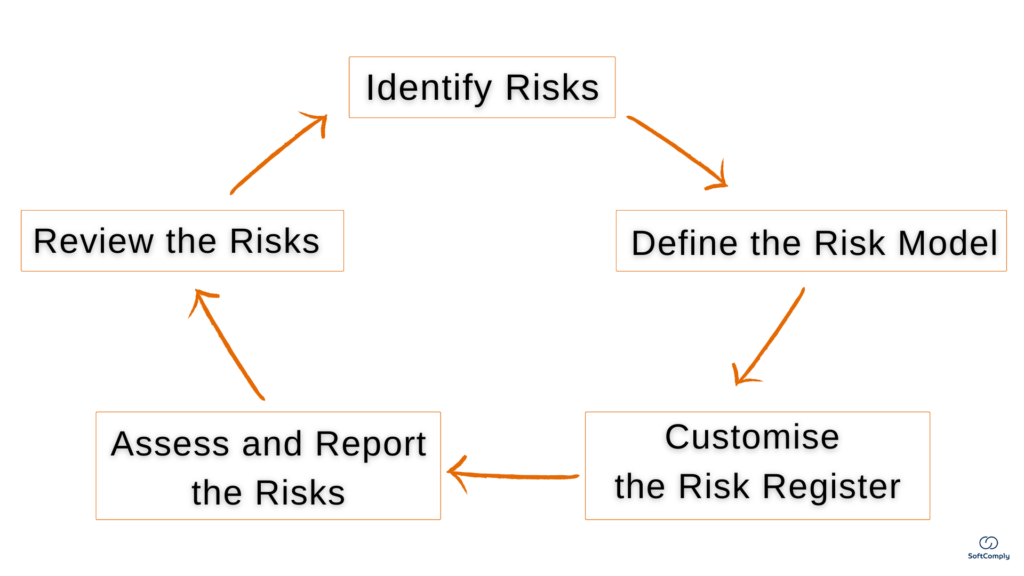
Step 1 – Identify risks;
Step 2 – Define the risk model;
Step 3 – Customise the risk register;
Step 4 – Assess and report the risks;
Step 5 – Review the risks continuously.
STEP 1 – IDENTIFY PROJECT RISKS
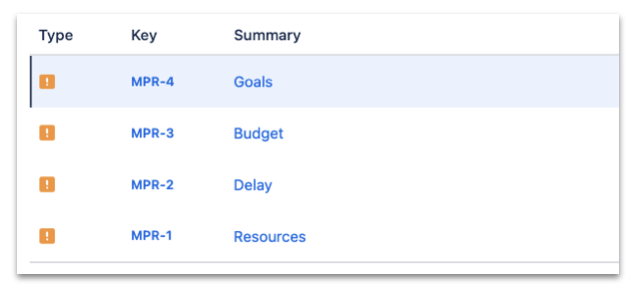
Run a brainstorming session with a team to identify your project risks. Pay attention to the most common showstoppers like communication, performance, cost, schedule, other internal and external changes, and of course the overall strategy and goals.
You will end up with a list of issues in your Projects. Best practice is to use a specific Issue Type, e.g. a custom issue type called ‘Risk’ is often used.
STEP 2 – DEFINE THE RISK MODEL
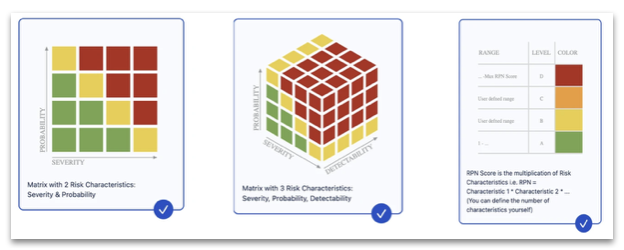
Every risk needs to be quantified to be able to prioritise the most important ones. Standard options are Impact (what will happen if this Risk becomes a reality?) and Likelihood (how likely it is that this Risk becomes a reality?). Very often further characteristics are needed for differentiation – e.g. Financial Impact, Performance Impact, Reputational Impact.
You will have different templates available, using SoftComply Risk Manager Plus. This is to help you get started and you will be able to customise according to your needs.
Many companies have set up specific Risk Models that every Project Manager needs to use, to create a common understanding across the company.
This step is easiest using the help of additional apps for Risk Management – all Risk apps allow you to put in place a simple 2-parameter Risk Model, and Risk Manager Plus allows you to use more than 2 parameters.
STEP 3 – CUSTOMISE THE RISK REGISTER
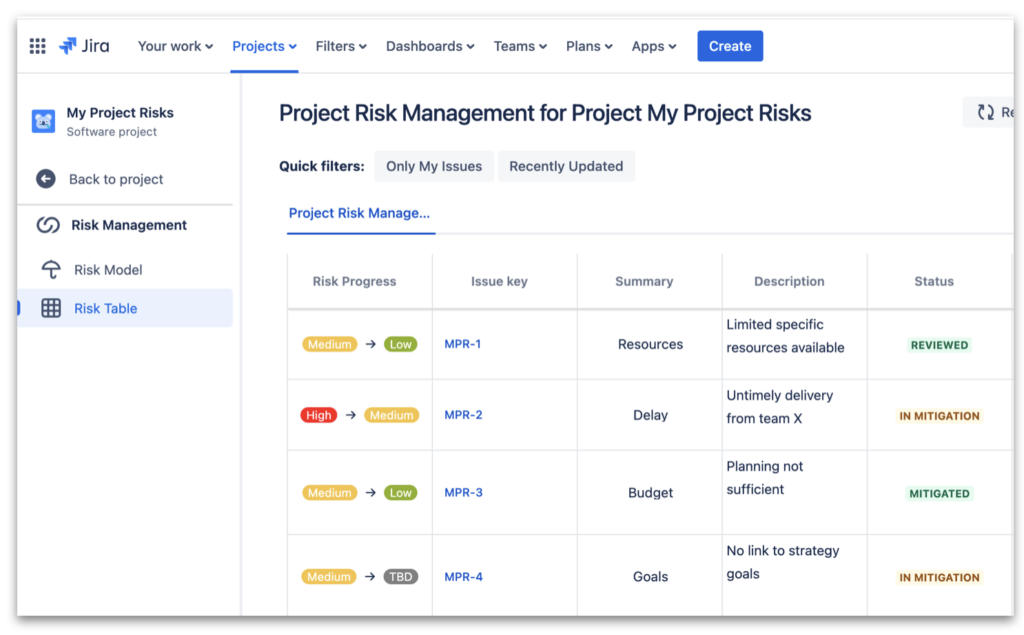
You can customise the risk-specific workflows and use statuses like “In Mitigation”, “In Approval”, “Mitigated”, “Reviewed”, etc.
If you are using Risk apps, you are able to focus on these specifically in a dedicated view – either as a specific Risk Register (List) or as a Risk Table (specific view, where you can prioritise, maintain and edit all your risks in a single table).
STEP 4 – ASSESS & REPORT YOUR RISKS
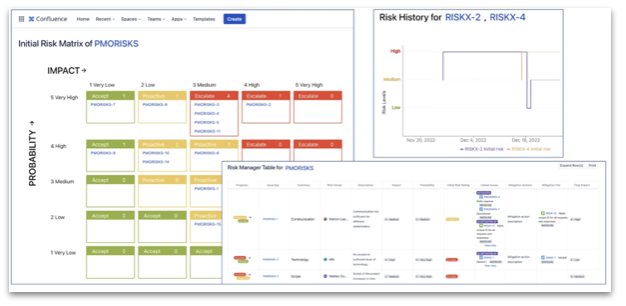
Once your team has created all Risk issues for a project, it is crucial to get a handshake from all the stakeholders. The best way to do it is to provide them with a list of risks in prioritised order, making sure that the most critical ones are clearly understood and everyone involved is on the same page. For this, you can export the Risk Table (only available for Risk Manager Plus) or take the reports to a Confluence page (using Risk Manager for Confluence). Other risk apps do not offer Confluence reporting option, but you can always take screenshots to share information.
STEP 5 – REVIEW THE RISKS CONTINUOUSLY
Usually, there is always something that we can do that will keep our critical risks under control. Start linking these actions to the specific risks and make sure the Assignee understands the criticality and due date of their tasks.
After initial Risk Review for the project – plan a regular risk review during your project meetings. Projects are not static – very often a risk that is considered to be Low at the start of the project, might become the Critical one during the course of a project.
This makes PMs work a lot easier, as you will see immediately from a Risk if the linked actions are completed or not.
OUT-OF-THE-BOX SUPPORT
To summarize, moving your Risk Management from Excel to Jira support risk traceability, data connectivity and team collaboration.
Specific Risk apps are useful if you wish to maintain the same level of control across your projects, and to quickly identify and visualise the prioritized issues.
Furthermore, it is easier to get started with your risk management and to generate specific reports for your project risks.
SoftComply Risk Manager Plus is the most comprehensive Risk app in Jira Cloud.
This app allows you to establish central Risk Models and Risk Registers for all projects. This helps to make sure that all projects are handled with the same principles and using the same framework.
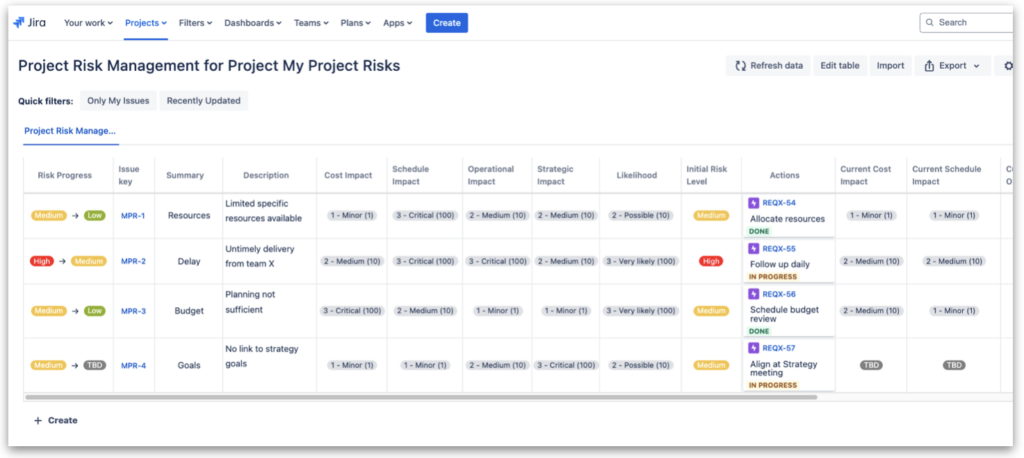
For the project manager, it will simply mean: Enabling the Risk Management app for the project, selecting a specific Risk Model and Risk Table, and identifying which issue type is considered a risk for the project. As a result, the Risks will be populated in a spreadsheet view where you can edit and update any risk related data.
Additionally, this is the only app where you can use a Risk Model with more than 2 risk characteristics (e.g. impact, likelihood, detectability). For simpler projects, there are a number of risk apps available, like the Risk Register and the SoftComply Risk Manager and others. These apps allow you to use max 2 risk characteristics like Impact and Likelihood for assessing each risk.
You are welcome to try out the SoftComply Risk Manager Plus for free for 30 days and if you need to discuss your specific approach with risk management, our specialised team is ready to support.


